Interview Scheduling: Set Up Your Calendar
Note: This feature is available for customers using AI Recruiter
By connecting your calendar to Humanly, you’ll have flexible options to schedule interviews based on your exact needs. Plus, automated invitations and personalized preferences make it easier than ever to stay on top of your schedule. Let’s get started!
What you’ll do
- Connect your calendar (Google or Outlook)
- Choose your calendar preferences
- Define interview format + details
- Set availability + scheduling rules
Step 1: Connect your Calendar
-
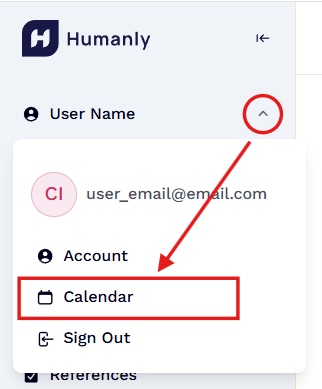
Once you’re logged in, navigate to Calendar by clicking the down arrow by your name
-
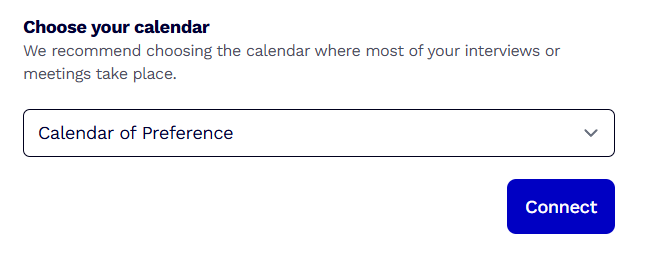
Click “Connect” next to your calendar type (Google or Outlook, this will match your email type)

- If multiple email addresses appear in a pop-up, select the same email that you did when logging in
- Click “Allow”
-
If multiple calendars show up again, select the one that is associated to your main work schedule


Step 2: Select your Calendar Preferences
Navigate to Calendar Preferences to provide your preferences
Step 3: Define Your Interview Format
Think about your meeting format preferences. Humanly will work with your administrator to collect this information to set it up in the candidate chatbots.
- Preferred meeting format (in-person, video, phone)
- Location, Link, Phone number or other preferences
- In-person: The address for the candidate to go to and any instructions
- Phone: Do you prefer to call the candidate or should they call you (and at what phone number)
- Video: Do you have a permanent URL for video meetings or would you like your calendar tool to set one up automatically
- Length of interviews
- How long wouldgive you like your interviews to last?
Setting Calendar Preferences
Video Demonstration
Time-zone: Set this to your home time zone
Invitees can't schedule within... : Submit the amount of time ahead you’d like to make the first available slot bookable.
Example: You’d like the soonest interview to be at least 4 hours from now, you’d set this to 240 minutes. The scheduling tool will still only allow available (Free, not-busy) time slots in your previously designated Availability hours booked by qualified candidates.
Allow same day: Check this box if open to interviews booked for the same day the candidate completes the chat.
Note
This will still follow Minimum Notice and Availability.
Set range of availability: This is the maximum amount of time in advance that someone can schedule an event on your calendar. This can be custom (ex. 45days) or one of the preset time frames. The Default is 30 days in advance.
Example
You’d like candidates to be able to schedule only 2 weeks in advance on your calendar instead of 30 days in advance then you can change this setting.
Add buffer time between meetings: If you’d like to make sure any scheduled interview is not immediately adjacent to another meeting or interview, you’ll set that amount of minutes here.
Example
You’d like 5 minutes before any interview free in order to prepare for the call; set this preference to 5.
Set your availability: This is where you’ll create time ranges for your availability. Times in this range will still only be bookable if they’re free in your calendar; no previously scheduled meeting or block would be able to be booked over if it was marked as “busy” in your calendar.
To set a range, choose a specific day or a block of days (Weekend, Weekdays). Once you select a day or block of days, set a start time and a finish time for your calendar availability.
- For example, to set Monday from 10am-3pm as available:
- Click on the
MonBubble, which will then add the default start times - Click on the start time and use the dropdown menu to change it to 10am.
- Click on the end time use the dropdown menu to change it to 3pm.
- If you want to add another time block, click the
+button on the previous time range. - If you want to delete a time block, click the
-button for time range. - Repeat these steps for other slots on Monday (ex: 4pm-8pm) and any other days.
- Make sure to click save at the bottom to save the changes to your calendar!
Other interview settings will be set by your implementation team at Humanly, including:
- Interview Invite Title and Description
- Interview format details
- Video link (for Google and Microsoft)
- Interview Reminders